

  1. Home Warranty
  2. Blog
  3. Repair & Maintenance
  4. How to Keep Your Outdoor Faucet in Peak Condition
outdoor faucet

How to Keep Your Outdoor Faucet in Peak Condition

outdoor faucet

Is your outdoor hose spigot leaking or cracked? Learn how to keep your outdoor faucet in good condition, no matter how cold or how warm the weather is.

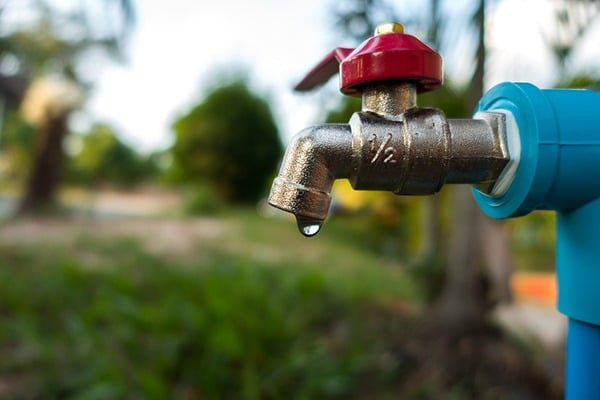
With the depths of winter approaching, it’s a good idea to get your outdoor faucets, also called hose spigots or hose bibs, ready for plunging temperatures. Leaking outdoor faucets can cause your pipes to freeze and crack, creating plumbing issues inside your home as well. 

Before the first freeze arrives, take steps to weatherize your outdoor faucets. And, if you're looking for suggestions on how to fix a leaky hose bib, taking a few DIY-friendly measures can help.

Why Do Pipes Break When They Freeze?

You might be surprised to learn that ice forming in a water pipe typically does not cause it to break where the ice blockage occurs. Although water increases in volume (by approximately 9 percent) when it freezes, and ice does put pressure on your pipes, it may not cause direct damage. Instead, an ice blockage increases the water pressure "downstream" — that is, between the ice and a closed faucet. 

Related: A Homeowner’s Guide to Frozen Pipes

This increase in water pressure is what typically leads to pipe failure, and if your pipes burst, they usually do so far from the site of freezing. That means that any ice that forms due to a leaky outdoor faucet can cause a pipe to rupture inside the walls of your home, leading to thousands of dollars in water damage.

Weatherizing Your Outdoor Faucets

Protect your outdoor faucets against those "downstream" breaks in your water pipes by taking the following measures.

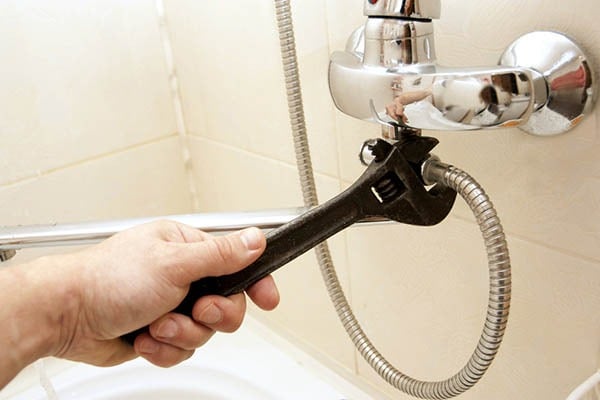
  • Conduct an inspection. Check your outdoor faucets for any leaks or drips and repair them before cold weather arrives. Also, inspect your exterior walls and foundation for cracks or holes near your hose bibs. Caulk or otherwise seal them to prevent cold air from reaching your pipes. 
  • Disconnect and drain all hoses attached to your hose spigots. Not removing hoses and any other connections from the hose bib can trap water and cause the fixture to freeze.
  • Drain the faucet. If possible, close the outdoor supply valve and drain the pipe leading to the faucet. By draining all water from the faucet system, you can prevent ice from forming. Before freezing weather sets in, locate and close the valve supplying water to the outside faucet, and then open the faucet outside and drain the pipe. (If your outdoor faucets do not have a dedicated supply, turn off the main water supply to drain them). 
  • Insulate. Protect your outdoor faucets from extreme temperatures using faucet covers, available at most hardware and home improvement stores. They’re inexpensive, easy to install (usually with no tools required) and have a lifespan of several years. If you live in a climate that turns especially frigid in winter, you might want to install some insulation inside the faucet cover to provide extra warmth.

Related: Protect Your Home Against Snow

Thinking about coverage?

Security for your home. Protection for your budget.

How to Fix a Leaky Hose Bib

If you discover that one of your hose bibs is leaking, you may be able to repair it yourself. Here are step-by-step instructions for diagnosing and correcting the source of your leak.  

  • Tighten the packing nut. Use pliers or a wrench, and tighten the packing nut next to the faucet's handle. Take care not to tighten the packing nut so much that the handle is hard to turn or you damage the fixture. Turn the water on and off, and if the dripping stops, nothing else needs to be done.

If the hose spigot continues leaking even after you've tightened the packing nut, you may need to replace the packing washer.

  • Turn off the water supply. Before replacing the packing washer, turn off the water supply. Next, drain the faucet. Be sure to do this before taking the handle assembly apart.
  • Remove the handle assembly. Use pliers or a wrench to turn the packing nut counterclockwise until you can remove the handle assembly.
  • Remove the packing screw inside the handle assembly. With the packing screw removed, use a standard (or slotted) screwdriver to pry the packing washer out. It’s a good idea to take the old washer to the hardware or plumbing supply store to make sure you purchase a replacement washer of the proper size.
  • Replace the packing washer and screw. Insert the new washer and screw it in place.
  • Reassemble the faucet handle and tighten the packing nut. Again, take care not to overtighten and possibly damage the packing nut. 
  • Restore the water supply. Turn on the water supply and turn the faucet on and off a couple of times to test your repair.

Whether you're dealing with a leaking faucet or a plumbing issue of much greater seriousness, you can save money on home maintenance costs with a Plumbing Home Warranty from American Home Shield®. We offer a variety of flexible plans to help cover the repair and replacement of your essential appliances and equipment, including those outdoor hose bibs. Contact us today to learn more about how we can help protect your home, as well as your household budget. 

Related: Maintenance Tips Every New Homeowner Needs to Know

Looking for an affordable home warranty plan, shop:

Home Warranty Plans

View Home Warranty Coverage 

Home Appliance Warranty Plans

Share:

AHS assumes no responsibility, and specifically disclaims all liability, for your use of any and all information contained herein.

American home shield short logo mark

Don't worry. Be warranty.

Have a plan for your home when things don't go according to plan

Shop Home Warranties