How to Deep Clean Your Kitchen

The thought of cleaning your kitchen can be intimidating, but there are few better feelings than a clean space. Let AHS help get your kitchen spotless!


The thought of cleaning your kitchen can be intimidating, but there are few better feelings than a clean space. Let AHS help get your kitchen spotless!
This isn’t a practice run, this is the real thing. Deep kitchen cleaning. The area will not only look amazing afterward, but your kitchen deep cleaning will also get rid of those lingering, unpleasant kitchen smells — and even do some much-needed kitchen disinfecting, too. Finish your coffee. Go to the bathroom. Now let’s do this!
1. Make room and clear your path. We are going to clean from top to bottom, inside and out. But to do this, you will need space. Get everything that doesn’t belong in the kitchen out of the kitchen — kids and spouses included. Empty the countertops. Move the chairs from the island or breakfast table. Empty the trash (and get ready to fill it again). Remove cookbooks and knick-knacks.
2. Fill a sink or tub with water to allow time for soaking. If you have a large, deep sink, you’ll need it next. If not, use a nearby bathtub or just make do. Fill it with hot water and dishwashing detergent. We’re going to let some things soak, like the microwave turntable, oven racks, stove drip pans and grates, silverware container from the dishwasher, and the crisper drawers from the refrigerator. If using the bathtub, you need to put a towel in the bottom to keep from scratching the finish.
3. Start with the largest appliance first, the refrigerator. This is deep cleaning, so empty it. Put the items on the counter, with the trash nearby. Get rid of the ice, if you have an ice maker bin. Then, put the bin in the sink to soak. Anything that is out of date, chunk it. Questionable leftovers or takeout? Throw ’em out. Any reusable containers need to go in the soaking sink. Wipe down the walls, shelves, door, and gaskets with a non-toxic cleaner. When replacing food items, be sure to leave room for the cold air to circulate around everything, and don’t block the vents.
4. Light fixtures and central air registers need to be dusted or wiped clean. Now we’re going up high. You might need a ladder for this. Make sure to get into recessed light fixtures for cobwebs. Remove the globes from surface-mounted lights or hanging lights, and clean them with a homemade glass cleaner or water and a high-quality microfiber cloth. Next, clean the ceiling fan, if there is one. It’s not a problem if dust falls to the floor — the floor will come later. If you have a hanging pot rack, remove the pots and wipe it down. Better check the pots for dust, too, while you’re at it.
5. Time to dust around the top of the room. Either use a telescoping duster or move your ladder around and wipe down the molding, corners, tops of cabinets, and the upper cabinet door fronts and pull handles. Don’t forget the top of the refrigerator and the vent hood. You can clean the vent hood filters in the soaking sink. The top of the door and window trim is almost always overlooked — but not today.
6. Clean the windows and the glass in any doors with your homemade glass cleaner. Then, wipe down the blinds or shutters.
Thinking about coverage?
Security for your home. Protection for your budget.
7. Clean the countertops next, and the backsplash, if you have one. There are lots of varieties of countertop materials: plastic laminate, ceramic tile, wood, granite, marble, and concrete. This is an area where you want to clean with methods approved for your material. You also want to disinfect and clean. When it comes to cleaning granite and marble, avoid commercial cleaners — they can remove the finish and ultimately damage your stone. Gentle dishwashing detergent and water will clean them, and a 50-50 mix of isopropyl alcohol and water will disinfect and buff out to a beautiful shine.
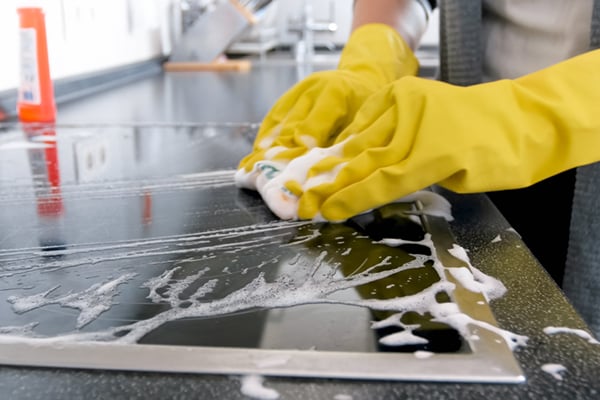
8. Clean the other appliances: the stove, refrigerator, dishwasher, coffeemaker and any other small appliances.
9. Wipe down the fronts of all the base cabinets, and the drawer and door pulls. Once you clean the front of the toe space under the cabinets, you have officially made it down to the floor. Whew!
10. Before you get to cleaning the floor, though, go back to the soaking sink and either hand wash the items, laying them on towels on the counter, or put them in the dishwasher if they are small enough. If they are hand washed, dry them and put them back where they belong.
11. Drain the sink, and then clean it with a mild cleaner and sponge. Carefully clean the disposal and then wipe down the sink faucet and handles.
12. Take out the trash and clean and disinfect the container before replacing the trash bag.
13. Sweep the floor, then mop it, or whatever is appropriate for your floor material. That’s it. Job well done. Fall out! (Or take a nap!)
AHS assumes no responsibility, and specifically disclaims all liability, for your use of any and all information contained herein.
Have a plan for your home when things don't go according to plan
Shop Home Warranties